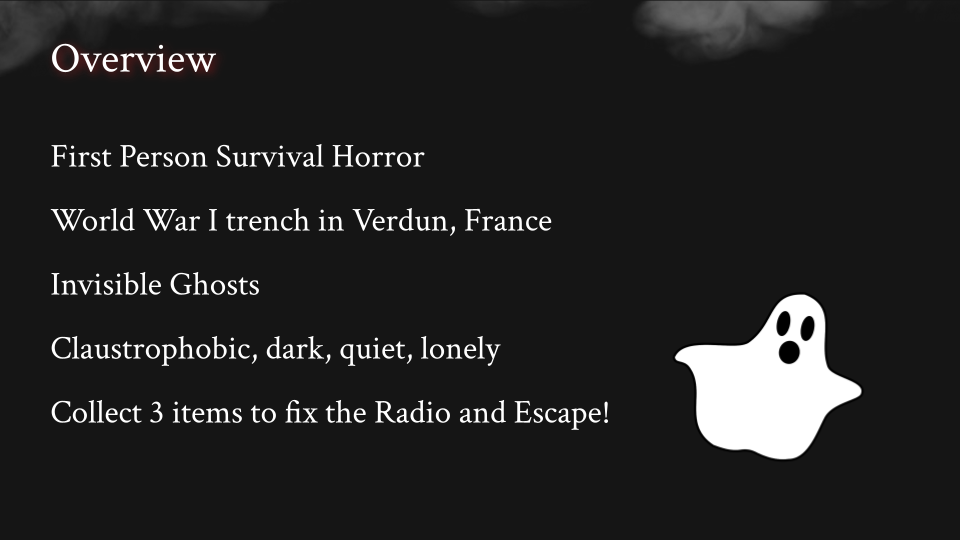
Souls of Verdun is a first-person, 3d, horror game in which the player attempts to escape a post-WWI trench being chased by an invisible ghost. This project was worked on by a team of 5 students over a 6 week period.
5 weeks of production, 5-person team, Released: Oct. 31, 2023
As Gameplay Programmer on Souls of Verdun, I created the player input and movement, the enemy AI, our compass proximity system, item switching mechanic, and a flare that would stun the enemy. I designed my classes to be designer friendly, so that it is easy for others change values inside the editor without understanding the code. I continually updated my team on my developments and pushed for early prototypes.
As Producer, it was my responsibility to make sure that my team has everything we need to succeed. This meant I kept track of our timelines and milestones, setup meetings, communicated needs to our group, manage a task list, and create an online space to communicate. Being a producer on this project gave me the opportunity to delegate tasks to individuals and to practice delivering presentations.
As producer on this project, it was my responsibility to make sure our team would meet our milestone goals and assignments. I organized the team by creating a discord server for us to communicate in. I facilitated regular weekly meetings to communicate our task progress, and assess what our next steps would be.
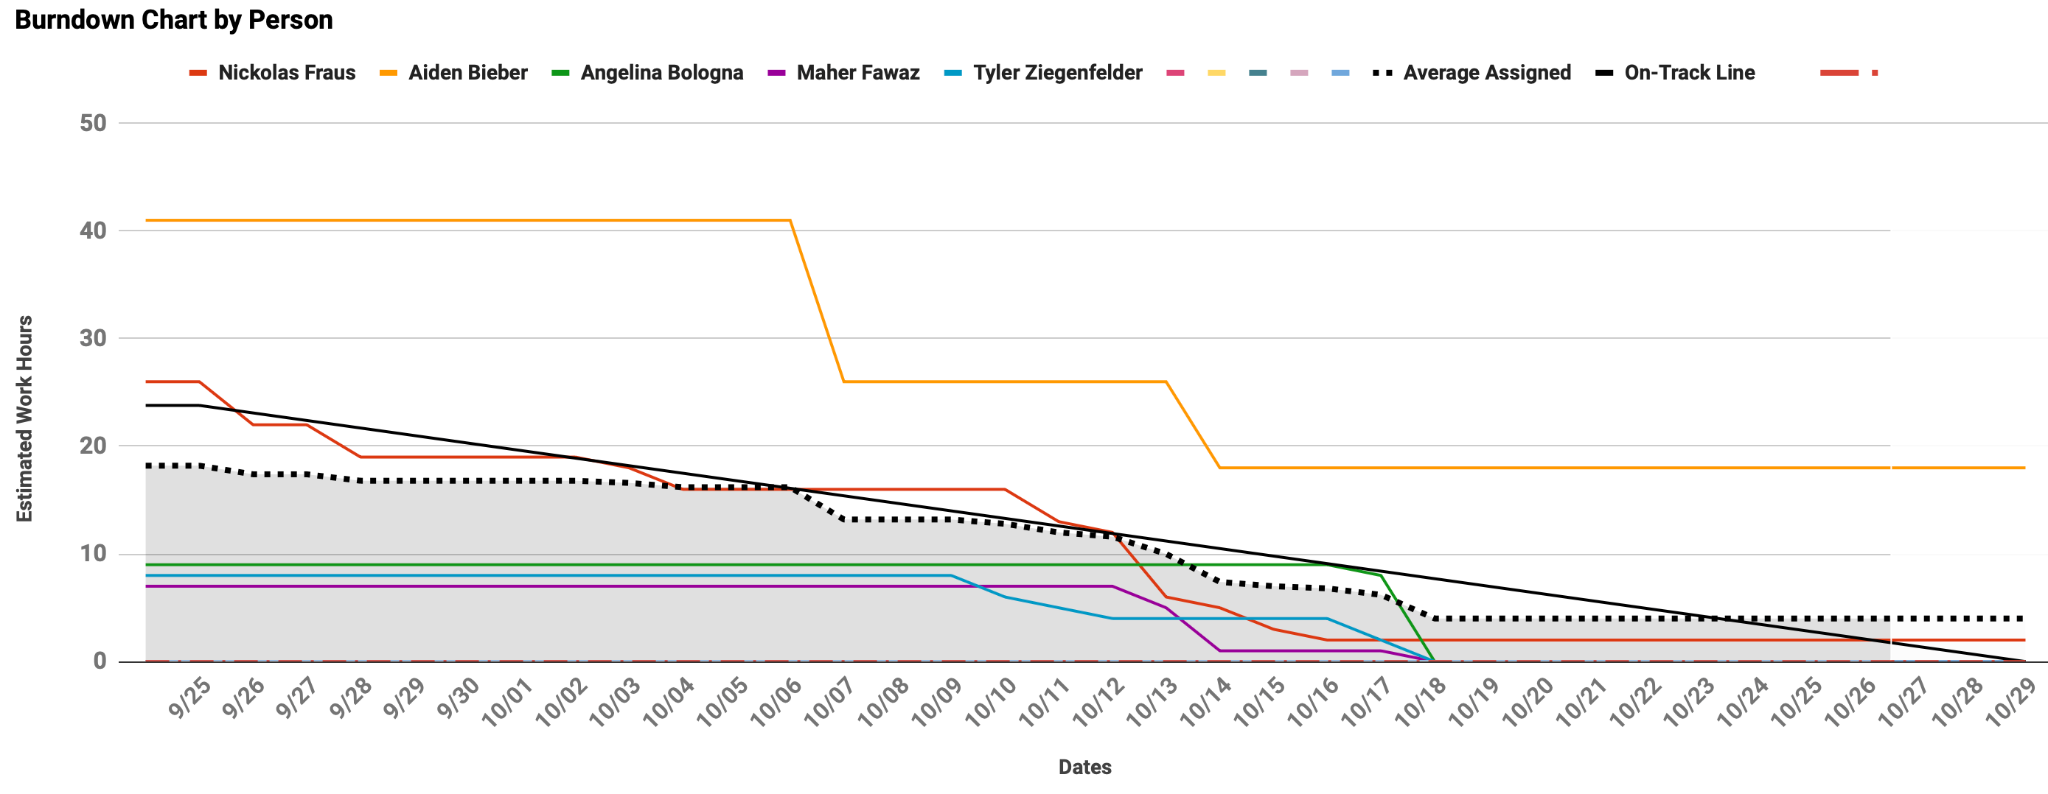
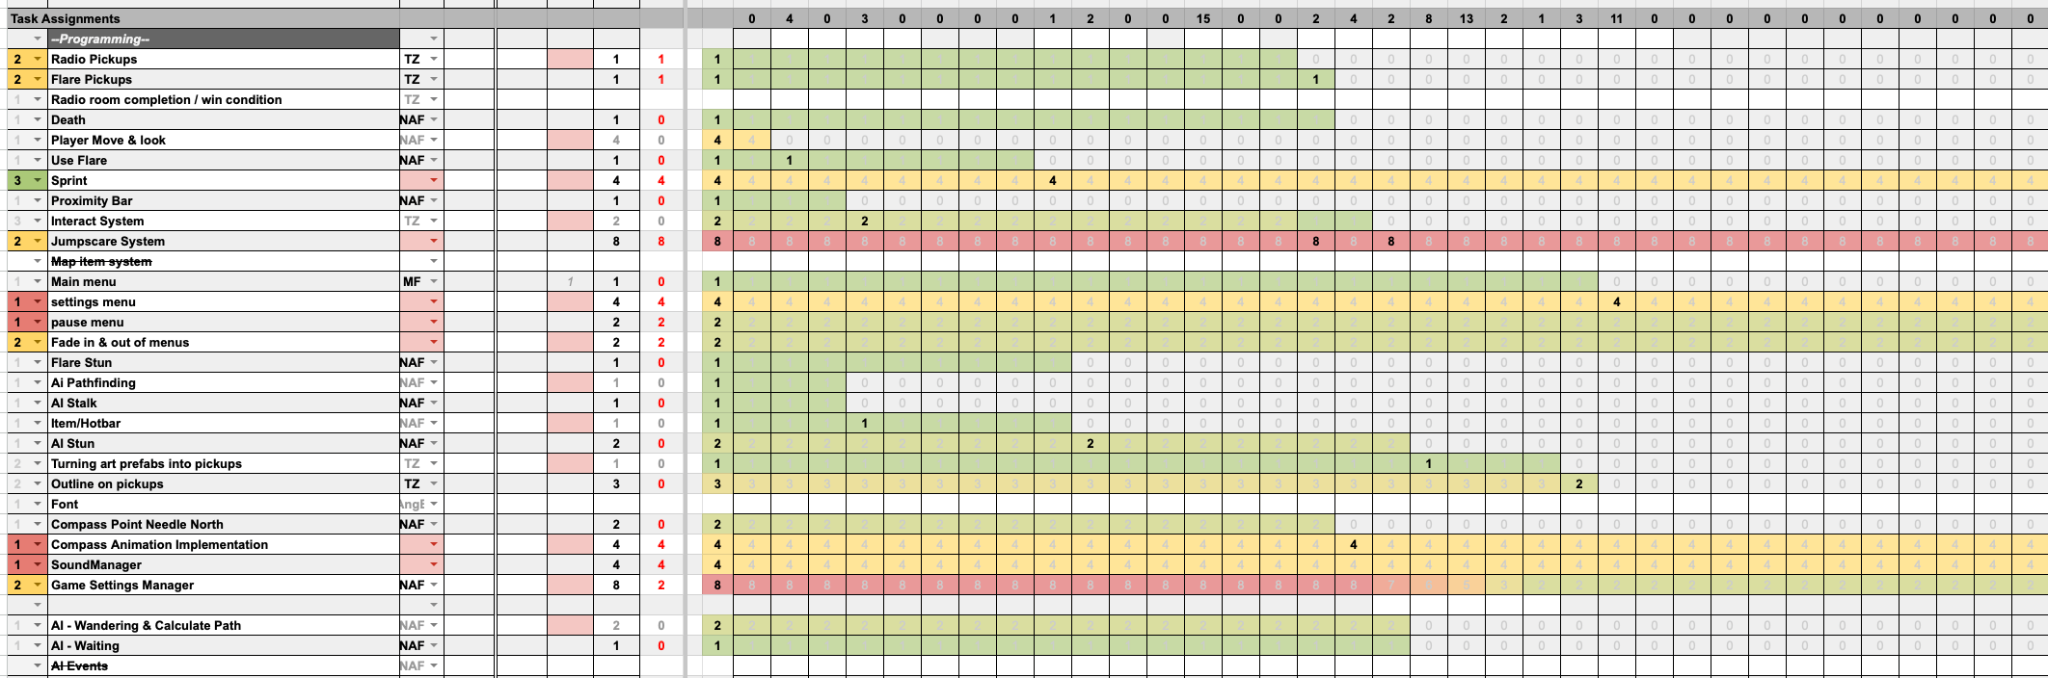
To track our progress, I maintained a burndown chart and a task list on Trello. This was helpful to see how things were moving along as well as seeing how much time individuals were putting into the project. On the last week of development the chart was not updated regularly because we were constantly communicating our updates and needs.
To meet milestone goals, I kept aware of our timeline and took this into consideration when delegating tasks. This ensured that the work we made as a team strongly contributed to our most time-constrained goals. As a class project- this meant hitting milestones rewarded us with good grades. This practice can be applied to real-world game studios as it mimicked milestones we will have as future developers such as prototypes, first playable, and alpha milestones.
In addition to delegating tasks to reach our project milestones, I was responsible for creating write-up reports and presentations on our progress.
Presently, I believe that the best practice for presentations is to take on the role of main spokesperson and to give team members content if they wish. I had determined this by sharing ideas and experiences with fellow student-producers. I found that not everyone will want to speak during a presentation, but those who do should not lose the opportunity to.
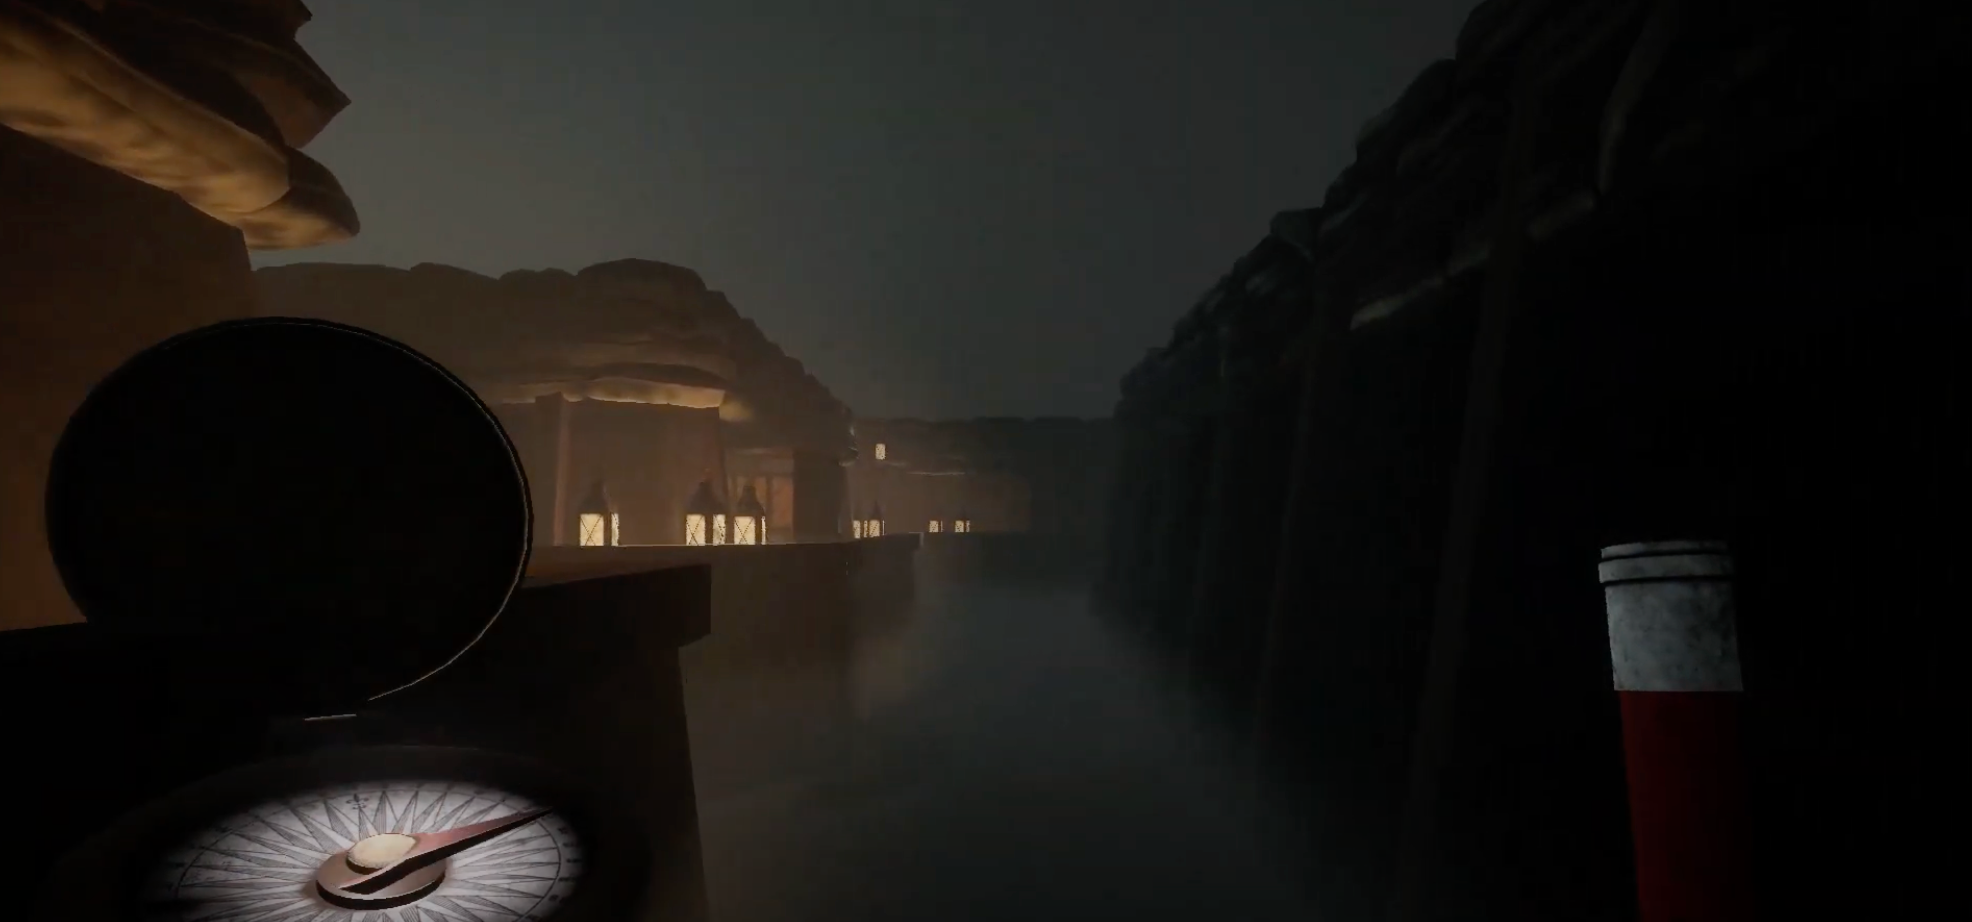
Finally, I designed our project's Itch page and recorded our game trailer. I recorded the trailer using Unity's Cinemachine Track System, Unity Timeline, and Unity Recorder. This allowed me to set up camera tracks to record predetermined paths, which led to some cool shots of the environment
Our team had a lot of ambiguity with the enemy. We lacked a clear vision of what we wanted from it specifically early on, and this slowed our development later into the project. With this experience, I plan to reduce similar damaging feature ambiguity by holding feature design discussions far sooner, and not accepting ambiguous answers to crucial features past deadlines.
This project provided practice with delegation outside of programming. For this project, there was always work to be done across all disciplines, it was just a matter of determining what the most pressing tasks were. I had instances in which individuals on the project did not meet expectations on several occasions, and I ended up having to pick up extra work. A fellow project manager of mine shared their successful outlook, to be accepting and understanding of the work of others to build a healthy communication network . In the future, I will put more effort into delegation and accountability and adopt an accepting outlook when delegating.
The goal for the enemy in our game was to create a single invisible, indestructible chaser. To achieve this, I needed to make a pathfinding object that could chase our player, trigger a jump scare, and implement other behaviors. I created our prototype player and I used Unity's Navigation system to swiftly setup pathfinding for the Enemy. Next I created a base Enemy class that constantly followed the player. Below shows my testing grounds in which the enemy was successfully able to pathfinder to the player.
Before developing anything else, it is essential that I have a complete vision with the rest of my team on what we want the enemy to do. I organized, facilitated, and took notes on an AI-specific discussion to solidify our vision. I built and shared the chart below with my team after the discussion to show how I planned to build the AI.
With the chart and vision finished, I was ready to continue development. I added a finite state-machine to the base Enemy class with the four states shown above, and an empty 'Idle' state. I created a method that would handle the behavior when switching states. The setup is quite efficient, because only the pathfinding and check have to run every frame.
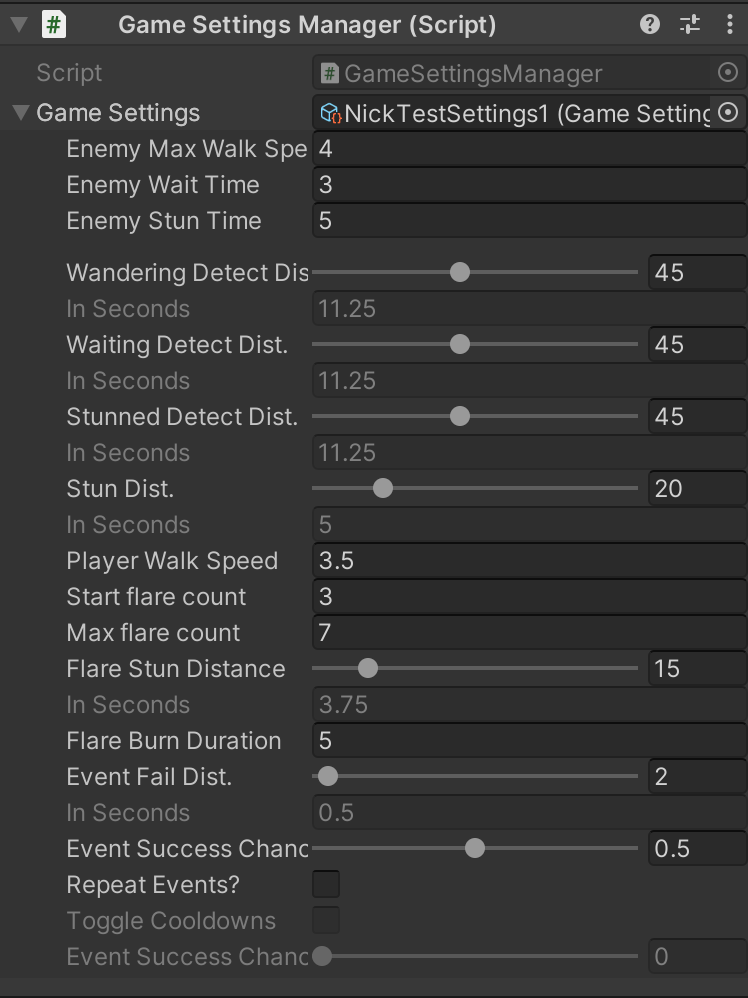
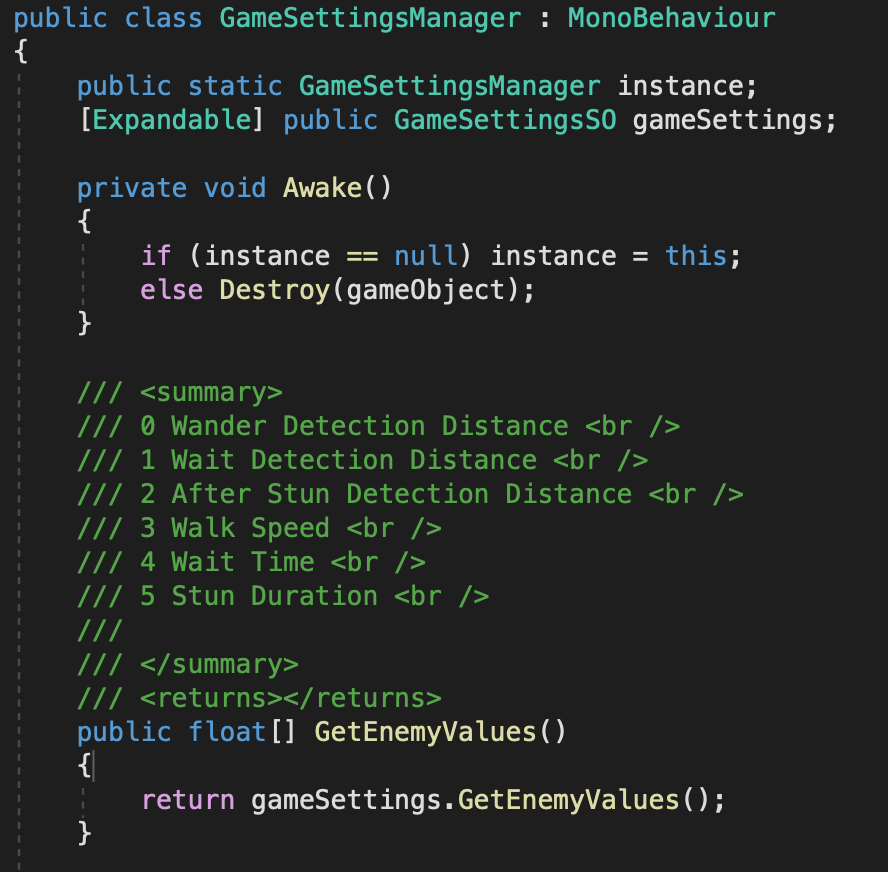
To aid the design of the game, I created a GameSettingsManager that would allow for easy tuning of any variables on the enemy. The GameSettingsManager is a singleton containing a ScriptableObject reference that contained the values to be used in the game. The GameSettingsManager simply had public methods to return the game setting values contained in the ScriptableObject reference.
After this project, I have learned better practices for state machines and getters/setters. For the next enemy AI I develop, I would abstract the system with a ScriptableObjects for state machines and individual states. The game settings manager will instead have a getter to access settings values individually as well.
I imagined that the existing behaviors were too little to make an interesting enemy. In an attempt to make our enemy more interesting, I held a discussion to brainstorm ideas on new behavior. We came up with proximity based events that would have random chances of triggering, if certain conditions were met. We wanted these events to be unpredictable startles that would occur when the player feels they are safe- teleporting the enemy in front of the player with a visual and auditory effect.
Unfortunately, I determined that our timeframe was too short to implement and test such a system and cut it from our task list. It would have been cool to make, but the playability of our game comes first.
Now that the base AI is ready, it is time to implement the complete game loop. The enemy needs to catch/scare the player and take them back to the main menu.
To research the jumpscare, I looked at footage from different horror games to see how they did it. I designed the enemy to call a Jumpscare function when colliding with the player. This would call functions other functions to disable player inputs, interpolate the camera to look at the enemy, and to play the enemy's jumpscare animation. This resulted in a jumpscare in which the player was suddenly forced to look at our visible scary enemy. If I were to remake this with what I have learned recently, I would use UnityEvents so that separate function calls do not need to be hard-coded when the jumpscare is called.
Following the initial implementation, the jumpscare was not consistent. I fixed bugs in which the enemy did not look at the player, the enemy would move too close to the camera causing it to clip, and the enemy did not appear to dash at the camera, and edge cases that would not start the jumpscare. These changes provided consistent jump scares for the player.
Making the Enemy AI gave me the opportunity to make jump scares for the first time, and allowed me to learn more about features in Cinemachine. This project gave me good practice with Unity Navigation and finite state-machines. To read more about the AI I have made, click here.
The goal for our flare was to be an item the player could pick up to fend against the invisible enemy. This requires an item/inventory system, a way to activate the flare, and for the flare to look for an enemy in range when activated.
First was the item switching mechanic. I used the New Unity Input System with number keys to call an event on an ItemSwitcher class. The ItemSwitcher would validate the switching of an item, and if valid would turn one item model on and the other item(s) off. It would simultaneously start an animation on an object holding the item to make the item come into view, as if it were pulled off of the player's hip. For the flare, I added functionality that would switch flares to a new flare when it finished burning, and switched to the compass if the flare finishes burning with no flares in the inventory. Later into development, we determined to remove our item switching system for playability.
Next was flare activation, starting with the inputs. I hooked up an event to call a function on the Flare to activate when the player left clicks. The function call checked that the player had a flare, did not already have a flare active, and has a flare in hand. Upon activation, a different active flare model was switched to and begun running a coroutine to check for the enemy proximity.
To check for the enemy proximity, I simply accessed the pathfinding distance from the enemy to player on the enemy class. If the enemy was in range of the player, the coroutine would then Physics Raycast to six different points (forward/backward, right/left, top/bottom) on the enemy to check if the enemy is in view. If both checks pass, the enemy is stunned for a duration. I set the coroutine to run every .1 seconds in attempt to reduce redundant checks.
In retrospect, for this project it was not necessary to do six different recasts to detect the enemy. There were few if any barriers or edge cases that would block the enemy's forward from view and not the rest of the model, which the 6 raycast points were meant to counteract.

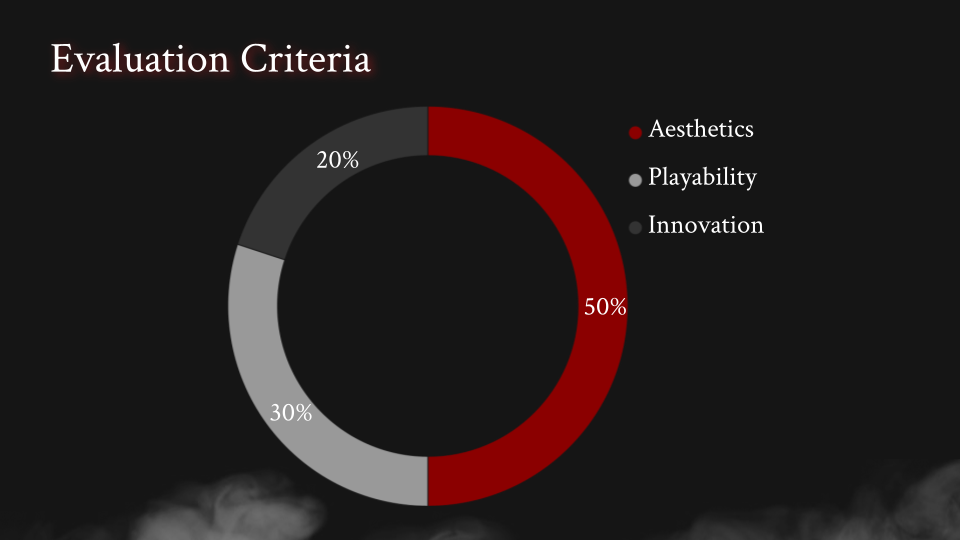
As a part of my course in the MSU Game Development Minor, my group was given the opportunity to conduct play testing sessions in which we received 15-20 reviews from peers. Our data collection methods included having team members facilitate the play testing and take notes on feedback, a feedback form I created with my team including personalized questions about our game, and a feedback form required from instructors. The instructor feedback form had the same questions for each team, and the chart below reflects our results from that form.
The chart shows that our game had average playability and innovation ratings. With our timeline coming closer to an end, I decided it best for our team to switch gears and polish our game to increase these ratings. To achieve this I delegated tasks to specifically improve our playability, some of which suggested by our play testers. We added safe zones that the enemy could not enter, larger outlines on pickups, larger areas to hover a pickup item, improved readability of our compass by slowing down animations and adding lights, fixing issues with our map collisions, adding more lights into the game, adjusting the compass to help point players in the direction of objectives, and adding lights over objectives to make them easier to locate.
The chart below shows our feedback after our final released build of Souls of Verdun.
As a result of switching focus and successful delegation, I was able to increase our playability ratings by 23%
Souls of Verdun resulted in being a huge success. Our team won an award for Best Aesthetics, and 3rd best overall game out of 8.This project gave me great practice in working with an indie-sized team. We designed, prototyped, and developed a full game in six weeks.
As producer, I was challenged with organizing and overseeing the development of a small team in a short amount of time. This required me to create tasks aligning to our time constraints, maintaining the scope of our project, and reducing harmful ambiguity. I facilitated meetings and was responsible for delivering our game. I learned about team dynamics, conflict resolution, and delegation. I practiced my skills in leading meetings and discussions, proper project scoping, and presentations.
As a gameplay producer, I was able to practice my skills in AI and player mechanics. I took on countless opportunities to collaborate with my teammates, which led to more work getting done. I learned the importance of code documentation and naming schemes to make code sharing easy. I learned how to use Unity PlayerPrefs to store and retrieve player settings. I created my first ever global game settings class using ScriptableObjects, and know what I can do better for my next project.
Since our enemy is completely invisible, the player needs feedback to know where it is. We decided on a compass that would spin when the enemy gets near, and I took on this part of development. To make this work, we would need to access the enemy's proximity and have animations for the compass. Additionally, we wanted the compass to act like a normal compass until the enemy gets near.
First, the enemy already has an accessible value for the proximity to the player, so that part was easy. I went through a few iterations of implementation, but landed on setting floats in an animator controller.
The compass class would set a float in the animator controller to the enemy proximity every frame, since this feedback is crucial to the player and should be updated as often as possible. If the proximity reaches certain thresholds, the animator will play the spinning animation.
To make the compass needle point North would require a lot of angle calculations. At first I did this manually, and made it work successfully. But with some changes to our compass model on the player, it had to be redone. While redoing it, I realized that to point north, the compass needly simply needs to rotate the inverse of the player's rotation, making it always point to a rotation of 0.
During play testing, players found that it was difficult to locate the items they would need to collect and the compass pointing north is unintuitive. To counteract this I changed the needle from pointing North to pointing in the direction of the closest active objective, if the enemy is not nearby.